

How To Get Epoxy Out Of Hair

So you're done with your latest resin masterpiece… it looks fabulous! You're excited, you run to show your friends, you facetime your mom, you show it off to your cat… and then you notice a hair.
A piece of dust.
A FLY (it's happened to me! Always, always, always cover your curing pieces).
Even with the best intentions and the best prevention techniques (um…. cardboard over top to protect your resin from flying hair and dust!) the inevitable is that somewhere on your resin journey you'll have to deal with yuck in your resin.
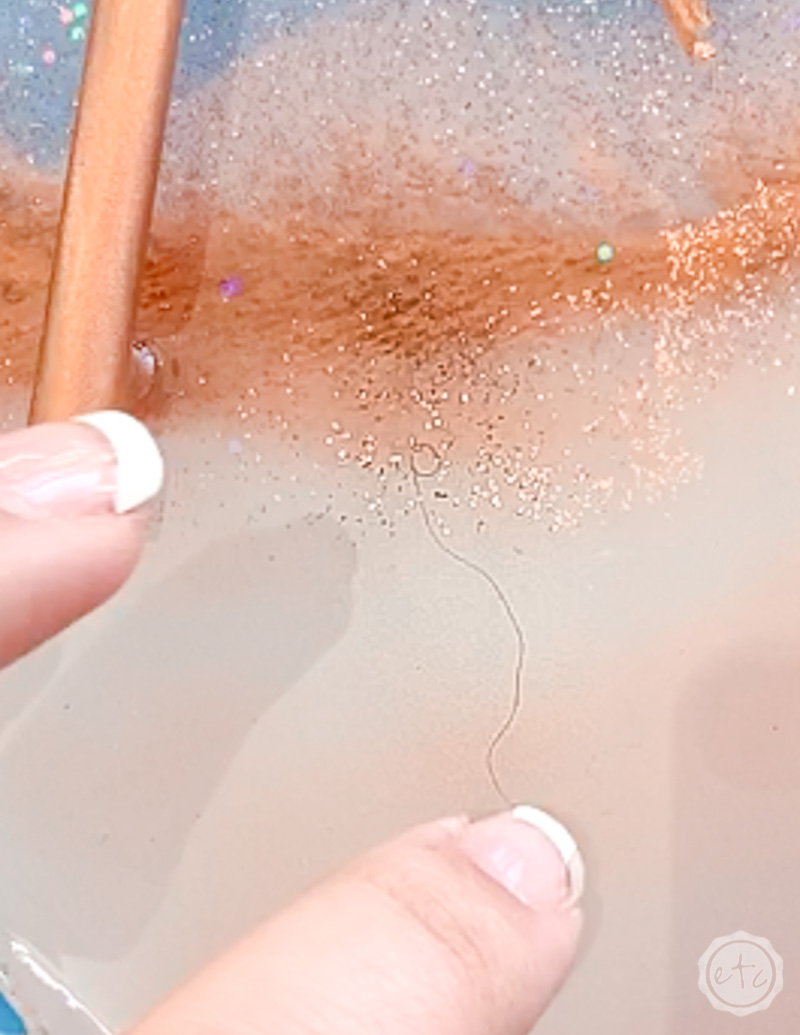
In this case we're talking about a hair in a beautiful rose gold and blush resin tray.
Not a little hair but a long hair… it goes all the way up, underneath the handle and out the other side.
Gross!
Luckily it's a pretty easy fix (and whether you're dealing with a hair or dust (or a fly!!)) the same technique will always work.
Supplies:
- Dremel
- Dremel Bit
- Respirator/Mask
- Sanding Paper
- Running Water
- Resin
- Silicone Brush/Stir Stick
- Gloves
- CARDBOARD
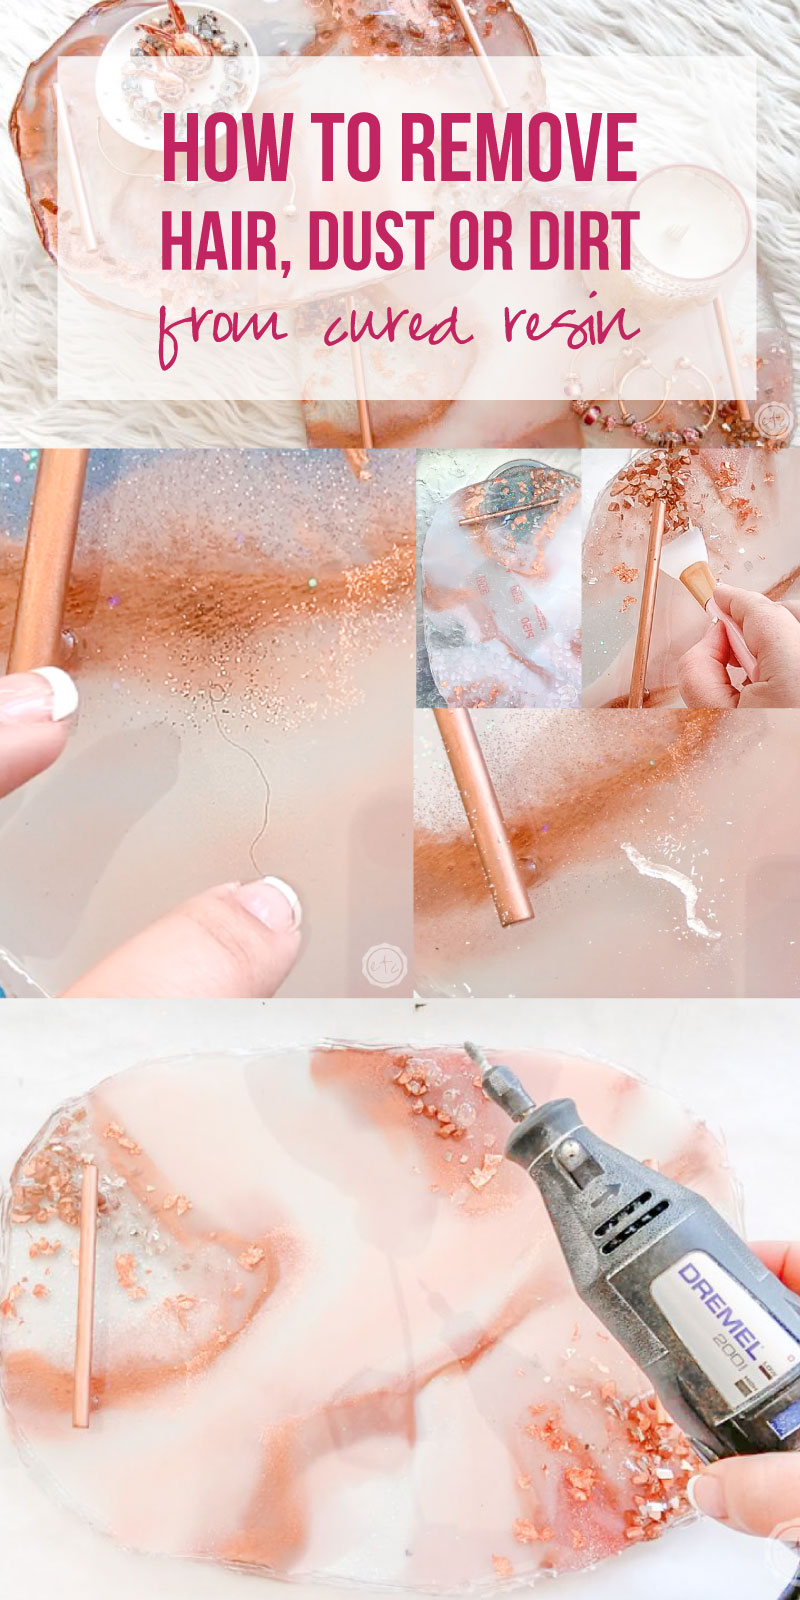
Step 1: Remove the Hair/Dust/Dirt
Of course, the best course of action when working with resin is to carefully check your piece before it cures to remove any stray yuck. But sometimes even if you've checked it over yuck happens.
Once your piece has cured and there is no way of removing the hair naturally the next best option is to sand. Start with a piece of sandpaper and slowly sand the hair or dust out.
For little pieces of dust or things right at the surface this is an easy solution. The dust will come right out and you can move on to the topcoat step of this little equation.
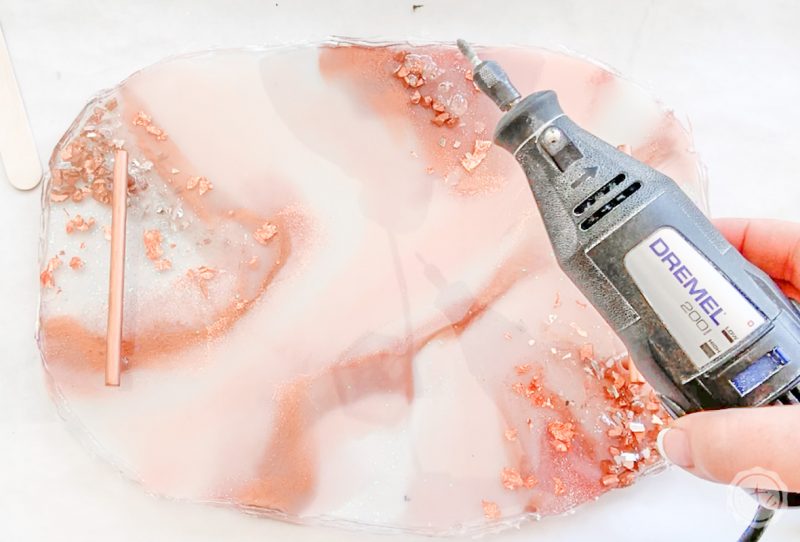
For pieces (like this particular hair) that have settled in to a bottom layer I would break out the dremel.
Start by going over the area where the hair is with the dremel, sand down a few layers and then use a bit of water to wipe the resin dust away. That will allow you to see the area you're sanding and if the hair/yuck is still there.
If so you'll need to continue sanding/dremeling down until every trace of the yuck is gone. I tried sanding with a light touch but I quickly learned that in clear resin what looks like it's right under the surface can actually be pretty far down… and when you're topcoating the entire piece with resin the trench won't be visible either way.
TIP: Resin dust is just as harmful as wet or curing resin (and it smells BAD) so make sure to wear your respirator when sanding!

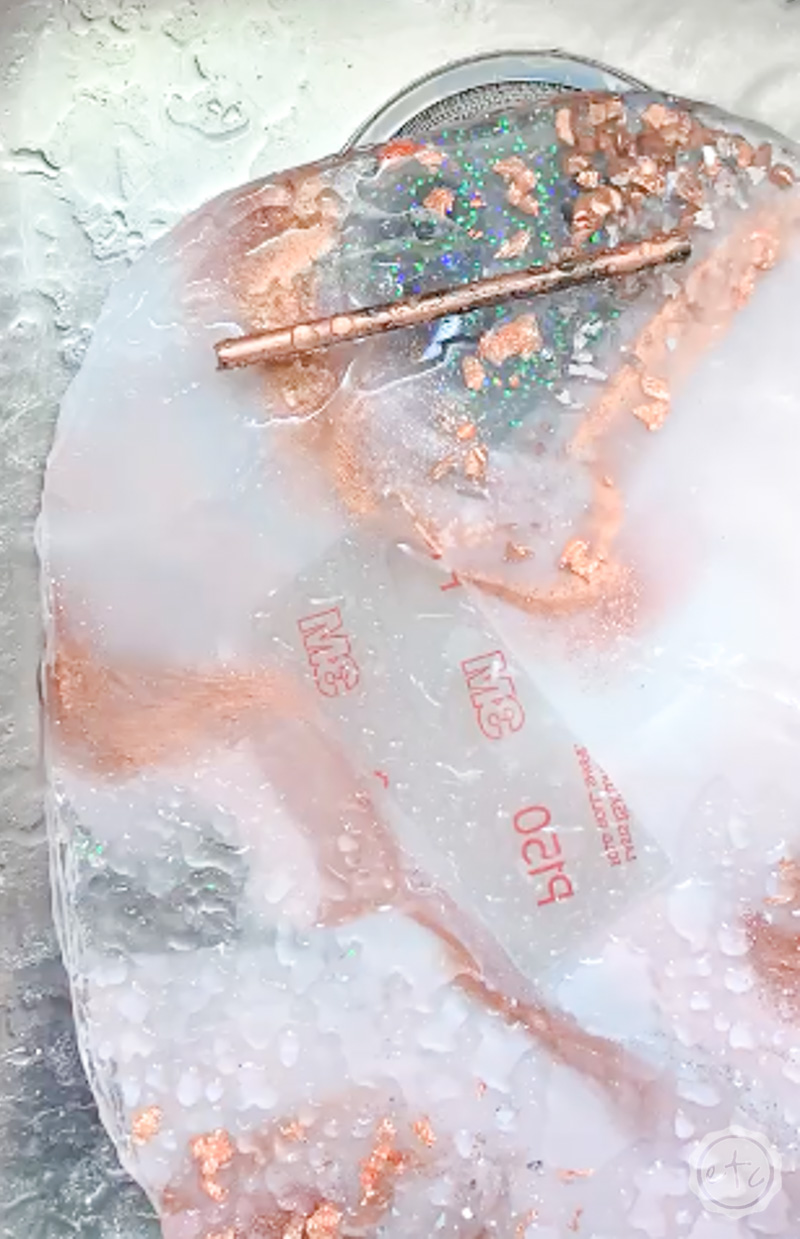
Step 2: Wet Sand the Entire Surface
Now that we've removed the yuck it's time to sand our entire piece. When you're talking about a small piece of hair like this it's tempting to simply topcoat the portion you had to dremel and move on. BUT your piece will look so much better if you take the time to unify the entire top.
And that means sanding.
Start by wet sanding the entire top with a medium grit and then moving to a finer grit sandpaper. You can use regular sand paper but I prefer a flexible sand paper. It works beautifully in the water and leaves the resin with a smooth appearance in the water.
When you're sanding in the water you'll see scratches on the resin with the initial sanding… the more you sand the more scratches will go away. The water will give you a good preview of how the piece will look once a new topcoat has been applied… so watch under the water until the surface looks crystal clear.
Beautiful darling!

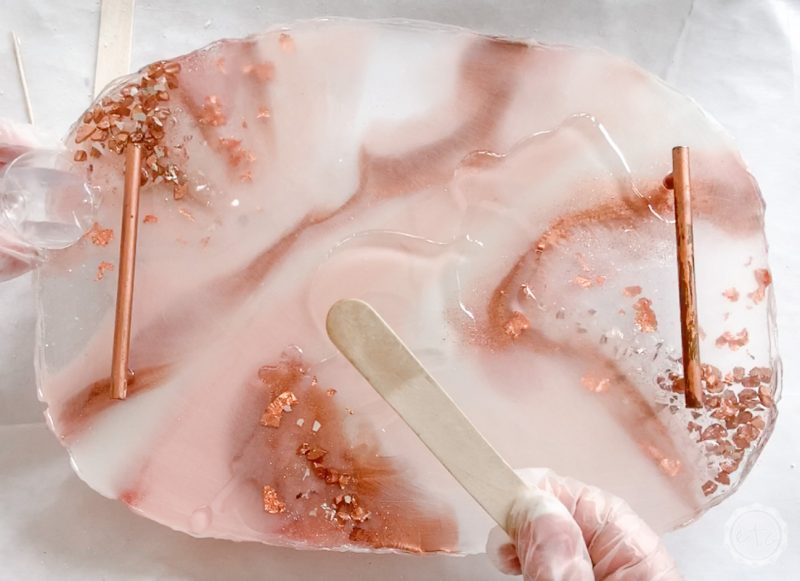
Step 3: Topcoat with Resin
Now it's time for the finishing touches!
Go ahead and mix about 30ml of resin to topcoat the top of your piece. In this case we'll spread the resin over the entire tray top and then leave it to cure (yuck free!).
Once the resin is spread evenly over the surface make sure to check the entire piece for fuzz and then cover your piece with a bit of cardboard (or plastic) to prevent new hair from falling in the resin while it cures!


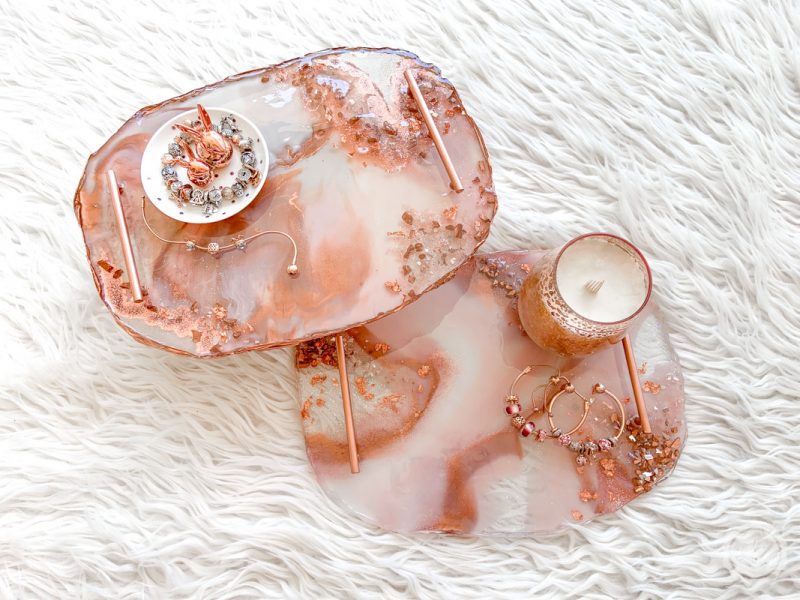
Look how they turned out! Absolutely beautiful!!
You can't even tell where that yucky hair was to start with.
Of course, you can use this technique with any resin piece but if you'd like to follow the full tutorial for this rose gold and blush tray you can check out the post here.
Looking for more resin tutorials? I've got you covered!

You made it through the entire post? That means you're one of my new favorite people! I'd love to be friends and see what else you would like to read about! Leave me a comment and then sign up for your very own FREE paint planner.... so that you can keep track of every single paint color with ease!
Welcome back! I'd love to be friends and see what else you would like to read about! Leave me a comment and then sign up for your very own FREE paint planner.... so that you can keep track of every single paint color with ease!


How To Get Epoxy Out Of Hair
Source: https://happilyeverafteretc.com/how-to-remove-hair-dust-or-dirt-from-cured-resin/
Posted by: chatmanthavir.blogspot.com
0 Response to "How To Get Epoxy Out Of Hair"
Post a Comment